
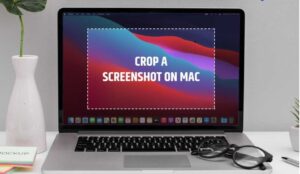
How to Crop a Screenshot on Mac will be discussed in this article. It can be useful to crop a screenshot after you capture it, even though your Mac allows you to snap full and partial screenshots.
There are other approaches of doing this, though. Which is the superior choice? I’m Tyler, a Mac technician with more than ten years of experience. I’ve dealt with a lot of Mac-related problems. Helping Mac users solve their issues and get the most out of their computers is the most satisfying part of our work.
How to Crop a Screenshot on Mac
In this article, you can know about How to Crop a Screenshot on Mac here are the details below;
I’ll explain how to take a complete or partial screenshot in this article. The quickest and simplest techniques to crop a screenshot on a Mac will also be covered.
Let’s get started with the several ways you can crop screenshots!
Key Takeaways
If you want to cut a screenshot on a Mac, you have a few choices.
Keyboard shortcuts can help you manipulate your screenshots more precisely.
To crop a screenshot, use the Preview app.
It comes installed with macOS as the default application and is totally free.
Another way to crop screenshots on a Mac is through the Photos app.
On macOS, this programme comes pre-installed and is also free.
To crop screenshots on a Mac, you can also use free online tools and third-party applications.
How to Take a Screenshot on Mac

Taking a screenshot is a quick and simple way to capture your Mac’s screen if all you want to do is that.
Fortunately, macOS comes preinstalled with everything you need to take a screenshot on a Mac. Also check TikTok bot
There are a few keyboard shortcuts that you can use, depending on your circumstance.
To take a screenshot of your entire display, simultaneously press Command, Shift, and 3.
Your computer will automatically save the image to your desktop.
To enable more precise control of your screenshot, press Command + Shift + 4.
You can choose the area you want to capture by using the crosshairs that will appear.
To take a screenshot of an empty window, press the following keys: Command + Shift + 4 + Space.
Simply click after selecting the window you want to capture.
You can open the screen capture panel to access more sophisticated features:
Simply press the Command + Shift + 5 keys simultaneously to open this menu.
You can choose options for screen capture and recording from here.
How to Crop a Screenshot on Mac
To cut a screenshot on a Mac, there are a few options.
The simplest solution is to simply use the Command + Shift + 4 keys to take a screenshot of a specific area.
However, there are a few methods you can use to crop a screenshot after the fact.
Start with the simplest task first.
Method 1: Use mac Preview
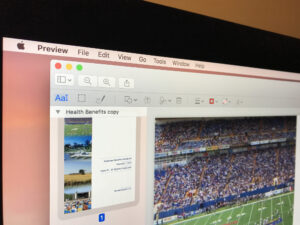
The Preview app lets you view pictures, documents, and even PDFs.
For editing your pictures, there are some helpful features.
The Preview app also makes it simple to crop screenshots.
Start by double-clicking the screenshot file to reveal it and crop it.
By default, the Preview application will launch.
Choose the pencil-tip icon next to the search field.
The markup tools will be shown after this.
Simply click and drag on your screenshot to choose the area you want to crop after the markup tools have been displayed. Also check Jarvee alternatives
Once you’ve made your choice, click Crop under Tools in the taskbar.
Method 2: Use the Photos app
On a Mac, using the Photos app is another simple way to crop a screenshot.
The Photos app has a number of editing tools for cropping and resizing photos in addition to being primarily used for viewing and organising your photo library.
Right-click the screenshot and choose “Open With” to get going.
If the Photos app isn’t listed among the suggested apps, simply choose Other and look for it in the Applications folder.
When the screenshot is opened in Photos, choose Edit in the top right corner.
All of the editing tools will then be accessible.
As you can see, the Photos app offers a wide range of photo editing options.
We simply need to find the crop tool, which is situated directly at the top:
To crop the screenshot to the desired area, drag your selection.
To save it, simply select the yellow Done button in the top right corner.
Method 3: Online Tools or Third-Party apps

If the first two techniques don’t work for you, there are a tonne of free online tools and third-party apps that you can use to crop a screenshot.
The most well-known websites are cropp.me, picresize.com, and iloveimg.com.
We’ll crop a screenshot with the help of iloveimg.com.
Simply access the website and choose Crop from the options at the top to get started.
To choose your screenshot from here, click the blue button in the centre.
You’ll be given the option to crop the screen after upload. Also check Windows Stop Code
Simply select Crop IMAGE after you have cropped the screenshot to your liking.
If your image doesn’t automatically download, simply choose Download cropped IMAGE.
Final Thoughts
You should now have all the tools necessary to crop a screenshot on a Mac.
There are a few different ways to crop a screenshot, depending on your preferences.
To save the most time, use a keyboard shortcut to take a partial screenshot.
If that doesn’t work for you, you can quickly crop your screenshot using the Preview or Photos app.
You always have the option to select from free online tools if those choices are inadequate.


